James Hardie fiber cement is one of the most durable, fire-resistant sidings you can put on a Northern California home — but the product is only half the story. How it is installed decides whether it delivers the decades of performance the material is capable of, and whether the manufacturer's warranty stays valid. Two homes can wear the same Hardie boards and get very different results, entirely because of what happens during installation.
James Hardie publishes detailed Best Practices and installation instructions for exactly this reason, and proper installation to those guidelines is what protects the warranty. This guide walks through the details that matter most — the weather barrier and flashing behind the siding, clearances and gapping, correct fastening, sealed joints, painted cut edges, and choosing the right climate-zone product. For the exact figures on gaps, clearances, and fastener spacing, defer to James Hardie's published Best Practice Guide and installation instructions; here we explain what each practice is for and why skipping it costs you.
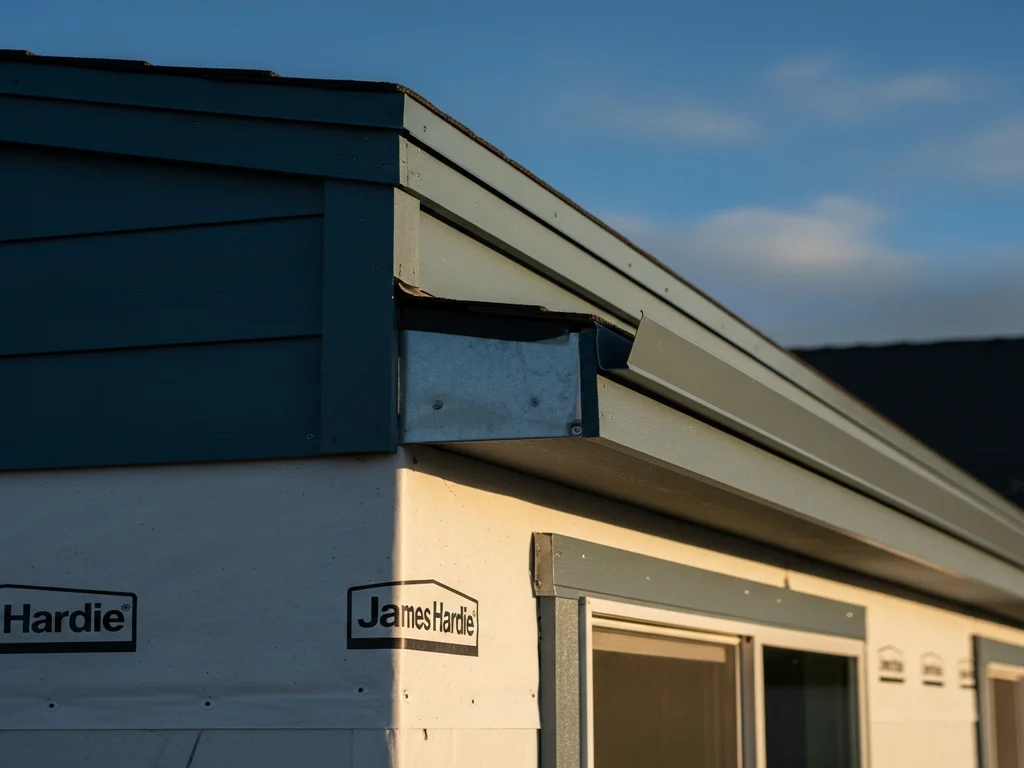
Install and best-practice facts on this page are attributed to the manufacturer, James Hardie. For exact clearances, gaps, and fastener spacing, follow James Hardie’s published Best Practice Guide and installation instructions.
Fiber cement sheds most of the water that hits it, but like any cladding it is not a standalone waterproofing layer. Behind the siding, a weather-resistive barrier — house wrap or building paper — forms a continuous drainage plane over the sheathing, and flashing directs water around every opening and transition. James Hardie's own moisture-management system pairs the HardieWrap® weather barrier with flashing and seam tape for this job.
The details that keep water out of the wall: a continuous, correctly lapped weather barrier; flashed and integrated window and door openings; kickout and step flashing where roofs meet walls so runoff is thrown clear of the siding instead of running behind it; and flashing that lets any collected water escape at the base of the wall. Get these right and the wall stays dry behind good-looking siding; get them wrong and even premium Hardie boards sit over a wall that quietly wets and rots.
Fiber cement is engineered to shed water and dry, but it should never sit in standing water or wick moisture from surfaces it touches. James Hardie's Best Practices call for maintaining clearances — keeping siding up off the ground, above roofs, decks, and paths, and off horizontal surfaces — so the bottom edges can drain and dry rather than staying wet.
Those same practices call for controlled gapping at butt joints and where siding meets trim, windows, and other materials, finished according to the method used. The exact clearance and gap dimensions are specified in James Hardie's installation instructions; the principle behind them is simple — give the material room to move and give water a way out, so the wall breathes instead of trapping moisture against the boards.
How the boards are nailed is one of the biggest differences between an install that lasts and one that telegraphs problems within a few seasons. James Hardie specifies fastening methods — blind-nailing versus face-nailing depending on the product and exposure — along with fastener types, placement, and how far apart nails go.
The most common field mistake is over-driving fasteners: a nail set too deep crushes the board and breaks the weather seal at that point, while nails placed too close to edges or too far apart leave the siding under-secured against wind. Correct fastening — the right fastener, driven flush and not over-driven, placed per the instructions — is what lets Hardie stand up to Northern California's wind, heat, and seasonal swings, and it is exactly the kind of detail a warranty claim is judged on.
Where boards meet, the joints have to be handled the way James Hardie prescribes for the method being used — whether that means a specified gap with sealant, a joint flashing behind the seam, or a factory-finished joint treatment. Done correctly, joints resist water intrusion and stay tight-looking; done casually, they open up, telegraph, and let water track behind the siding.
Cut edges deserve their own attention. Every time a board is cut on site, the raw edge is exposed, and James Hardie's practices call for sealing or priming and painting those cut edges so they match the factory-sealed surfaces and resist moisture. On ColorPlus® pre-finished products, that means using the manufacturer's touch-up so cuts and fasteners disappear into the finish. Skipping cut-edge sealing is a small step that quietly undermines both appearance and durability.
James Hardie engineers its products for climate through the HardieZone® system, and installing the correct zone product is both a performance and a warranty matter. Most of California — the Central Valley, foothills, and coast — falls in HZ10, engineered for heat, sun, and coastal moisture. The high Sierra and the Tahoe/Truckee area fall in HZ5, engineered for freeze-thaw cycling and heavy snow.
For Northern California work that spans from the valley up into the mountains, that distinction is real: a home in Roseville or Sacramento and a home in Truckee or Tahoe City are in different Hardie zones and call for different engineered products. Using the wrong zone product means the siding was not built for the conditions it faces — a performance risk and a warranty exposure. Matching the product to the zone is part of specifying the job correctly from the start.
Because so much of Hardie's performance and its warranty ride on installation, who installs it is not a detail to leave to chance. Fiber cement is heavy, dusty to cut, and unforgiving of shortcuts — the fastening, flashing, clearance, and gapping details all have to be done to James Hardie's Best Practices for the product to perform and for the warranty to stay intact.
A qualified, experienced installer knows those instructions cold, respects the weather barrier and flashing behind the siding, and treats cut edges and joints the right way. At AlderStone Remodel we install Hardie across the Sacramento region, the Placer and El Dorado foothills, and up into Tahoe and Truckee — matching the right HardieZone product to each location and installing it to the manufacturer's standards so the siding delivers the decades it is built for.
Installation and the warranty go together
James Hardie’s siding warranty assumes installation to its Best Practices. Choosing an installer who follows those instructions is not just about a clean-looking job — it is what keeps the manufacturer’s coverage intact for the life of the siding.