Transitions are the part of a flooring project nobody chooses in a showroom and everybody looks at afterwards. A strip of metal in a doorway, a lip you catch your toe on, a threshold that is a different colour from both floors it joins — these are the details that make a beautiful floor read as a builder-grade job. Done well, they are invisible; done badly, they are the first thing a visitor notices.
They also do real work. Every point where flooring changes material, changes direction, meets a fixed vertical element, or crosses a large open span is a point where something has to happen structurally as well as visually: two assemblies of different heights have to meet safely, and floors that expand and contract have to be given room to do it. This guide covers both halves — how a house flows, and what has to be detailed for that flow to hold up.
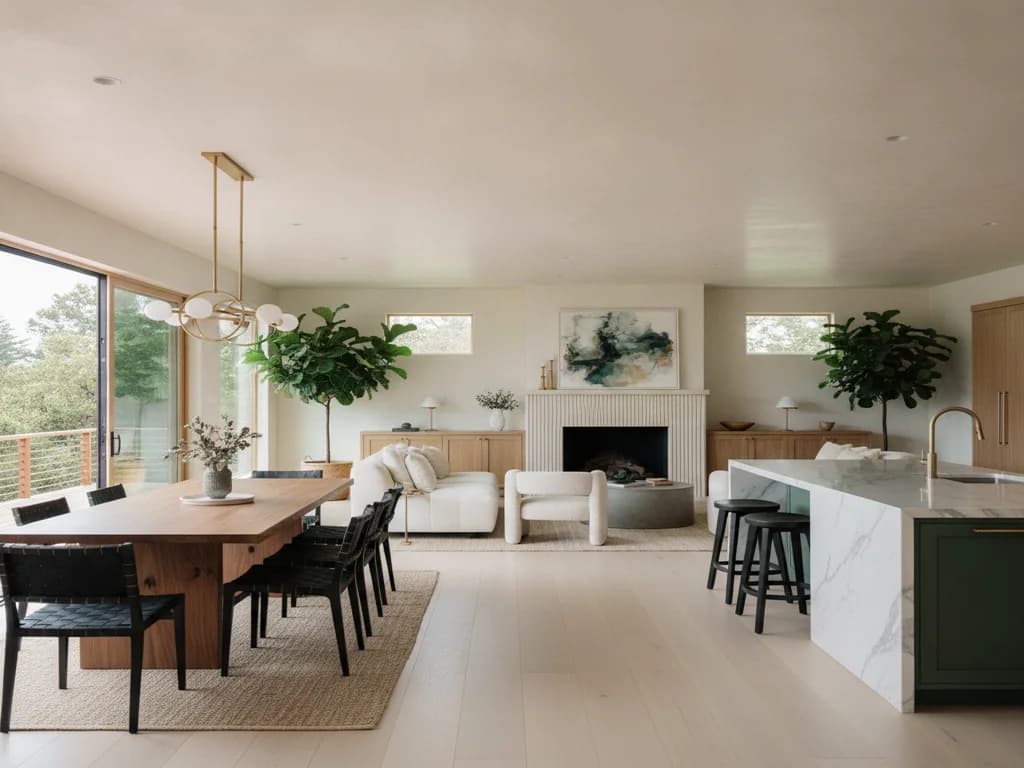
Running one floor continuously through the public areas of a house is the single most effective thing you can do to make it feel larger. Sightlines carry uninterrupted from the entry through the living space to the kitchen, the eye is not stopped at every doorway, and rooms read as parts of one volume rather than a series of boxes. In an open plan it is close to mandatory — a material change in the middle of a single open space almost always looks accidental.
It also simplifies the project in ways that are easy to overlook. One product means one flatness tolerance, one acclimation, one installation method, and no transitions to detail through the entire run. It usually looks better and it is frequently less work.
The room-by-room approach still has its place. Bedrooms take carpet in plenty of households that want hard surface everywhere else. Bathrooms and laundry rooms often take tile regardless of what runs through the rest of the house, because standing water is a different problem. A tiled entry is a durable and traditional choice where boots and grit arrive — particularly in foothill and Tahoe homes. What matters is that the change happens at a natural boundary, in a doorway or at a change in level, rather than mid-space.
The constraint on continuity is usually the substrate rather than taste. If part of the house is slab-on-grade and part is a raised foundation, or if a later addition sits at a different height, running one material across everything may not be practical. Those are real conditions to design around, not obstacles to bulldoze.
Continuity matters most where walls have come out — see our guide to opening up a closed kitchen, where the new floor has to read as one space rather than two rooms that used to be separate. Planning guidelines from the National Kitchen & Bath Association treat that continuity as part of how a working space is laid out, not as a finish decision made at the end.
Different assemblies build to different heights
A tile floor over backer board or an uncoupling membrane, a floating LVP floor over an underlayment pad, an engineered floor glued to a slab, and a solid floor nailed to a subfloor all finish at different heights. Where two of them meet, that difference has to be resolved. The time to work it out is during material selection, when a thinner underlayment or a different installation method is still available — not at the doorway on installation day.
Existing height differences are already there
Older homes frequently have a step between the original house and an addition, or a raised threshold at a bathroom, or a slight drop into a converted garage. New flooring does not remove these, and pretending otherwise in the planning stage produces surprises. They can be worked with — a deliberate step reads as intentional in a way an accidental lip never does.
Where the new floor is higher than the old
Adding thickness raises everything sitting on the floor. Appliances that slide under a counter, cabinet toe kicks, the relationship between a finished floor and a toilet flange, and every threshold to an adjoining room all shift. In a kitchen or bathroom, that is worth checking before ordering material rather than discovering during installation.
Levelling the difference out
Where a modest height difference has to disappear rather than be expressed, a reducer profile or a feathered levelling ramp in the substrate can absorb it over a short distance. Larger differences are better handled as an honest step with a proper nosing than as a long ramp people trip on.
Each profile does a specific job. Choosing the right one and placing it at a genuine boundary is most of what separates a transition you never notice from one you always do.
The profiles and what each is for
- T-moulding — joins two floors of the same height, the standard detail between rooms with equal build-up.
- Reducer — steps down from a higher floor to a lower one over a short, walkable slope.
- Threshold or end cap — terminates a floor cleanly at a doorway, a sliding door track, or a fixed edge.
- Stair nosing — finishes the front edge of a tread, and is a safety detail as much as a trim one.
- Metal schluter-type profiles — a clean modern edge at tile, particularly where tile meets a lower floor.
What makes one look wrong
- A transition strip in a colour that matches neither floor it joins.
- A raised lip at a doorway that is high enough to catch a toe or a walking aid.
- A transition placed mid-room rather than at a natural doorway or level change.
- Silicone or caulk used to close a gap a proper profile should have covered.
Where a transition sits in a path of travel, the change in level is also a safety question — the model codes published by the International Code Council, which California adapts into Title 24, address abrupt changes in walking surfaces and the stair and landing conditions transitions frequently sit next to.
Door clearance is the constraint homeowners forget, and it produces more late-stage surprises than any other transition detail. Interior doors are hung with a small gap beneath them, and a new floor that builds up even modestly can consume it. The door then drags, or refuses to close over the new material entirely.
The fix is straightforward if planned and irritating if not: doors are removed and trimmed at the bottom before the new floor goes in, which is a normal part of a flooring project scope. What causes trouble is discovering it afterwards, when the doors are hung, the floor is finished, and trimming means removing every door and creating dust in a completed room.
The same question applies to more than doors. Bifold and pocket door hardware, floor-mounted door stops, sliding closet tracks, the swing clearance on a shower door in a bathroom taking new tile, and heating registers that sit flush in the old floor all interact with a change in floor height. Registers in particular are commonly missed — a floor that builds up leaves the register recessed, and the fix is a new flush-mount frame rather than a shim.
Baseboard is the other half of the conversation. New flooring can either butt to existing base with a shoe moulding covering the gap, or the base can be removed and reinstalled over the new floor for a cleaner line without shoe. The second looks better and is more work, and it is a decision worth making deliberately rather than defaulting to whatever is quickest.
Almost every hard-surface floor moves. Wood expands and contracts with humidity, and floating floors — LVP and laminate included — expand and contract with temperature and are installed as one large connected raft that is not fastened down. Both need room at the perimeter to do that, and that room is the expansion gap.
The gap runs around the entire perimeter of the floor: at every wall, at every door jamb, at cabinet toe kicks, around hearths and columns, and at pipe penetrations. It is covered by baseboard or shoe moulding, or by a transition profile at a doorway — never filled with caulk, adhesive, or grout, because filling it defeats the purpose entirely.
When the gap is missing or has been filled, the floor has nowhere to go when it expands. It presses against the perimeter, and because it cannot move outward it moves upward — peaking at a seam in the middle of a room, or lifting along one edge. This is the classic buckled-floor call, and the cause is almost always at the perimeter rather than where the damage shows.
Large open runs have their own requirement. Floating floors have maximum dimensions a manufacturer will allow in a single unbroken field, and a run longer than that needs an intermediate expansion joint — commonly placed at a doorway where a transition profile hides it. This is why very large open plans sometimes have a transition strip in a doorway that looks unnecessary. It is not decorative.
A heavy fixed object that pins a floating floor to the substrate causes the same problem locally. Cabinets, kitchen islands, and anything else fastened down should sit on the subfloor with the floating floor running around them, rather than being installed on top of a floating field and locking it in place.
Expansion behaviour differs by material, which is one more reason the transition plan and the material choice belong in the same conversation — see our comparison of LVP, laminate, and tile.
Should I run the same flooring through the whole house?
Through the public areas, usually yes — it makes the home feel larger, keeps sightlines uninterrupted, and removes the visual chopping that a change at every doorway creates. It also simplifies the installation, since there is one product, one tolerance, and no transitions to detail. Whether it continues into bathrooms and laundry rooms depends on the material's tolerance for standing water, and bedrooms are where many households still prefer carpet. The practical limits are substrate consistency across the house and existing height differences between an original structure and later additions, which sometimes make a single continuous floor impractical.
Will my doors still close after new flooring?
Only if the build-up is accounted for. Interior doors hang with a small gap beneath them, and a new floor that adds height can consume it — leaving doors dragging or refusing to close. Trimming doors at the bottom before installation is a normal part of a flooring project scope and is straightforward when planned. It becomes irritating when discovered afterwards, since the doors then have to come off a finished room. The same applies to bifold and pocket hardware, closet tracks, floor-mounted door stops, and flush-mounted heating registers, all of which interact with a change in floor height.
What is an expansion gap and why does it matter?
It is the space left between the edge of the floor and every fixed vertical element — walls, door jambs, cabinet toe kicks, hearths, columns, pipe penetrations — that lets the floor expand without pressing against anything. Wood moves with humidity, and floating floors move with temperature as one connected raft. If the gap is missing, or has been filled with caulk or adhesive, an expanding floor has nowhere to go outward, so it goes upward — buckling at a seam or lifting along an edge. This is the most common cause of the buckled floors we are called to look at, and the fault is nearly always at the perimeter rather than where the damage appears.
Do I need a transition strip between two rooms with the same flooring?
Sometimes, and the reason is expansion rather than appearance. Floating floors have a maximum unbroken dimension a manufacturer will allow in a single field, and a run longer than that needs an intermediate expansion joint — usually placed in a doorway where a transition profile conceals it. That is why large open plans occasionally have a strip in a doorway that looks unnecessary. Where the run stays within the manufacturer's limits, the floor can carry through doorways continuously with nothing at all, which is nearly always the better look. Confirm the limit for the specific product before assuming either way.
How do I handle a step between the original house and an addition?
Express it rather than hide it. A deliberate step with a proper nosing and consistent finish reads as intentional and is safer than a long shallow ramp that people misjudge. Trying to make a meaningful height difference disappear over a short distance produces exactly the trip hazard you were trying to avoid. Where the difference is modest, a reducer profile or a feathered levelling ramp in the substrate can absorb it cleanly. Which approach fits depends on how much height there is and how the two spaces connect, and it is worth deciding at the design stage rather than at the doorway on installation day.
Can transitions be made to look less obvious?
Considerably. The biggest improvement is placing them at genuine boundaries — a doorway, a change in level, the edge of a cased opening — rather than partway across an open space where the eye has no reason to expect a change. After that it is material and colour: a threshold matching one of the two floors, or a flush metal profile at tile, reads far better than a contrasting strip that matches neither. Removing and reinstalling baseboard over the new floor rather than butting to existing base and covering the gap with shoe moulding also produces a cleaner line throughout. Each of these is a small decision that adds up.
Planning a whole-home floor in Rocklin, Granite Bay, Folsom, or elsewhere in Northern California? We detail the transitions and door clearances before the material is ordered. Request a free estimate
The following government agencies, industry organizations, and official resources provide additional information relevant to your remodeling project.